Monday, November 11, 2013

Using Foam Board to Create Two Mixed Media Projects


Foam Board is an interesting product for the mixed media artist to utilize.  It is strong and lightweight, which makes it an interesting surface to work on.  I decided to create two different projects:  the first is a layered "clipboard" using shredded paper and a piece of black cloth that had been previously mono printed on a gelli plate.
Using a box cutter (or exacto knife) cut the foam cor to the desired size

I spread Yes! glue over the surface..

then scattered shredded paper over the glue

I used a piece of parchment paper to press the shredded paper onto the surface to assure good contact.

While the paper was drying, I glued my fabric onto the surface of a smaller cut of Foam Board.
I wrapped the fabric around to the back and glued into place. 


Once dry, I used Tacky Glue applied to the back of the small Foam Board panel
and seated the wrapped panel onto the center of the larger panel.


any shredded paper that was hanging over the edge of the Foam Board.

Finally, I glued this funky "alligator" clip to the surface.
The result is a funky note-holder that can be hung on the wall!


Next, I cut a piece of Foam Board to be just larger than a stenciled birthday card
and glued it into place.

On the back of the Foam Board, in the top center, I pressed a pop top from an aluminum can
into the foam to leave an indent.  Then, I glued it into place.

Foam Board Express comes in a nice variety of colors, so check them out:

Be sure to hop over to all the other participants in this fun blog hop:

Leave a comment and be eligible for these prizes.  The giveaway ends Thursday, November 14th at 11:59 PM CST.

Foam Board is giving away:

PRIZE PACKAGE: Foam Board Express would like to offer a package of five (5) of its 20-inch by 30-inch flat display foam boards, including one black foam board, one white foam board and three additional foam board sheets in colors chosen by the winner.  Color choices include:  green, red, yellow, dark blue, neon yellow, neon orange and neon pink. 

and 

StencilGirl is giving away:
Mary Beth's new DVD called: StencilGirl Mixed Media Sampler Journal!


Friday, November 8, 2013

Sweet Gum Balls: A Play Date with Jane LaFazio's Beautiful Stencil!

Sweet Gum Balls Stencil

Sweet Gum Ball Stencil by Jane LaFazio

Oh! How I love Sweet Gum Balls.  They remind me of my sweet gum tree in the garden of my previous home in Kansas.  Because it is fall I decided to work in autumnal colors to create the top and bottom boards for a future book.
First, I gessoed each book board.  After drying I covered one of the boards with strips of washi tape, which was then glazed with a rose-colored transparent acrylic paint and allowed to dry.
Using a new (to me) product I recently discovered, I placed the Sweet Gum Ball Stencil over the glazed tape and, using a palette knife, spread the Viva Ferro special effects paste across the stencil, being careful to stabilize it on the surface.  Once the Ferro, which feels basically like tinted spackle, was covering the area positioned over the book board, I lifted the stencil to reveal a lovely dimensional design!
adding washi tape

re-punching holes in the book board

painting surface with transparent acrylic paint


spreading the Viva Ferro over the stencil after positioning it over the surface of the book board


I repeated the same step on the second book board, which was simply painted with metallic paint prior to using the Ferro paste.  Both gave beautiful results.


Next, I was curious to see how the stencil looked when used over a piece of art paper with openings.  For this, I used acrylic paint.  I like the effect of the stencil design overlaid onto the painted paper.


This stencil is going to be useful to me on both cloth and paper.  I can't wait to try it on some other projects!

Please be sure to stop by the other participating artists' blogs.  Thanks for stopping by!


 The participants in today's hop:


Sunday, November 3, 2013

Your Heart & Intuition....


My dear friend Karen sends a lovely e-newsletter every week called "Self Care".  I saw this in my box when I returned home from Houston and the International Quilt Festival and thought this was  appropriate to share after being around all the artistic talent housed inside the George R Brown convention center.
If you are interested in more of Karen's Self Care tips click here for the link to sign up.

There has been radio silence from me due to some technical problems with my computer while I was away (frustrating!).  I'll try to catch up on some of the things that have been happening, so stay tuned.
Here is Karen's post.  While I believe it applies to everyone, artists need to pay attention to this message as it relates to their work:

Your Heart and Intuition  

"Your time is limited, so don't waste it living someone else's life. Don't be trapped by dogma - which is living with the results of other people's thinking. Don't let the noise of others' opinions drown out your own inner voice. And most important, have the courage to follow your heart and intuition. They somehow already know what you truly want to become. Everything else is secondary."                                                                                                              -Steve  Jobs

It's been more than two years since the world lost the treasure that was Steve Jobs. He was a creative genius, a visionary, and above all
 , a wise and compassionate man. He had much to teach us. Of all the quotes posted on the internet around the time of his death, I like the above.

So many times our own inner voice is drowned out by others; our loved ones', our friends, our leaders, or even people we don't know who shout their views through the media. Faced with the volume and amount of opinions of others, we often lose our confidence in our own values, beliefs, ideals and ideas.

Self care is about trusting, listening to, and honoring your heart and your intuition. The next time you doubt yourself, think of Steve Jobs and his courage to listen to his inner voice.   

Friday, November 1, 2013

"What's For Dinner" Is A Hit in Houston!

Jamie and I were so thrilled that everyone loved the "What's For Dinner" exhibit in Houston.
A reporter and photographer from the Houston Chronicle interviewed us on Sunday during Quilt Market and took numerous photos, several of which I will share here along with the link:
Here I am, posing with my piece, "Nourishment and Tradition"

Jamie poses with her "Four Food Groups"
I love this photo of us...

And, of course, we started cracking up!

The photos are the property of the Houston Chronicle. Click here for the article.

I have loads of photos from the exhibit but have not had time to add them to my computer.  I will add to this post very soon, but wanted everyone to see the article.  We were so thrilled!  Thanks to the Houston Chronicle for featuring this beautiful, fun exhibit.  No one enjoyed it more than we did!


Wednesday, October 30, 2013

Come See "What's For Dinner?"!

My friend and partner-in-crime, Jamie Fingal, and I have a long-running conversation about what we are cooking for dinner.  This lead to a cooking (and restaurant-appreciation) blog, and eventually Jamie began asking her Facebook followers, "What's For Dinner?".  Last fall, we discussed the idea of creating a unique quilt exhibition with this title.
This amazing pan was hand-painted by Desiree Habicht
and given to Jamie for her 60th birthday!

Each piece was created inside a 15"L by 24" W format, something about the size of a placemat (or a cafeteria tray).
We are very excited to debut this exhibit at the International Quilt Festival in Houston.  Jamie and I had a difficult challenge because there were so many wonderful submissions.  Please stop by and take a peek at this fun and creative exhibit at the festival, and I hope you will stop by the blog and let me know you saw it!
I gave my curator's piece a great deal of thought.  I like the idea that we eat for sustenance, but we also have a lot of traditions surrounding food that are handed down in families.  I have a ritual of making my grandmother's English Date Pudding and my late sister's recipe for Southwestern style dressing each year during the holidays.  There is something comforting about the creation of these dishes and remembering the women who taught me how to make them.
It was with these thoughts that I created my piece, called "Nourishment and Tradition".
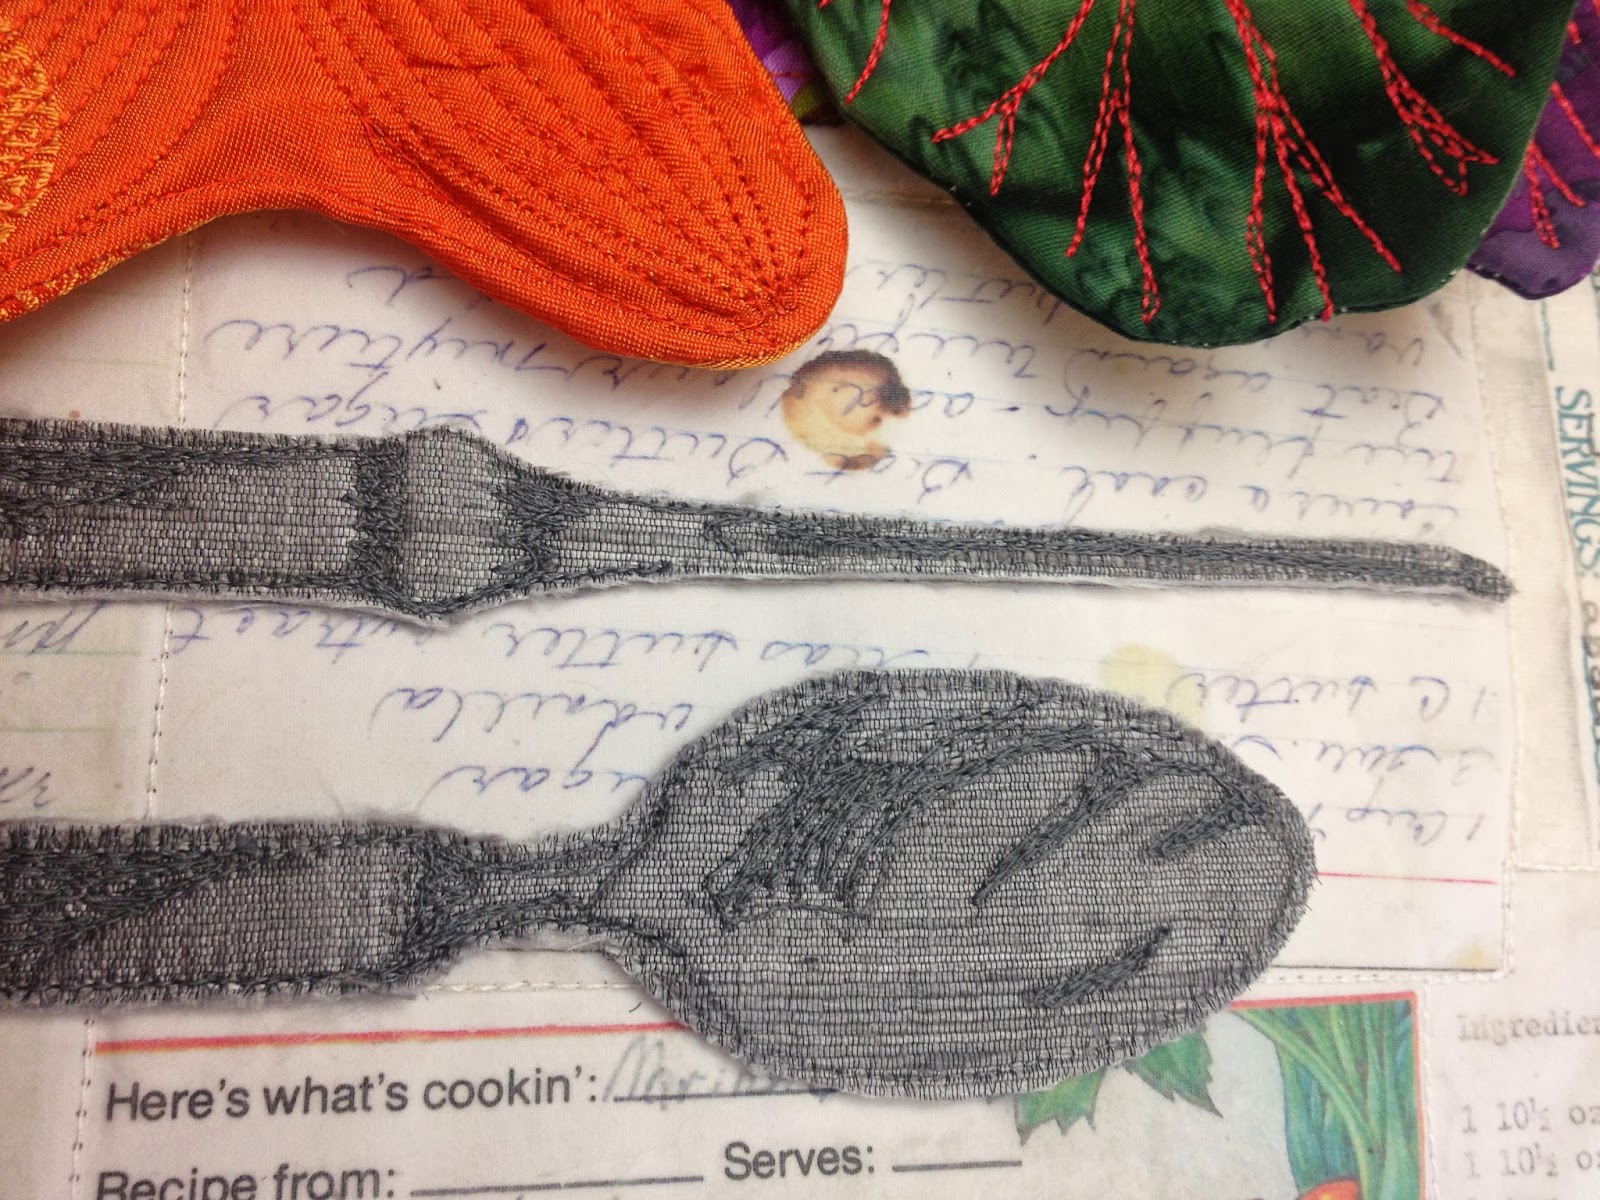
I started out by making color laser copies of some of my mother and sister's old recipes.
I like that they have splatters on them.

I laminated the papers to a piece of silk organza with matte medium.
Once dry, the excess paper on the back of the recipes was removed.

Since my husband and I eat a great deal of fish it seems 
appropriate that I would have one on the plate.
And...I never pass up the chance to use a googly eye or two! 

We generally eat a lot of salad or some other type of greens.
I wanted them to be dimensional.

To make the flatware I used my own stainless and made drawings on gray silk
and thread painted the reflections.

The napkin is held in place with a few stitches.
The plate fabric, a piece of lovely Kaffe Fassett cloth, strongly resembles 
my Tracy Porter dishware.  It works!


Thursday, October 17, 2013

"Our Roots Run Deep"

Greetings!  I am waaaaaay behind with my blogging, but I have been chasing my tail back and forth across the country for the past 6 weeks.  I'll try to put together a photo diary of what has been happening.  Before I left for the first (of three recent) trips to NY I created this quilt, which is to be auctioned off next month as part of a fundraising event for the Quilt Alliance.  The Alliance is celebrating 20 years, so each of the entries were to be 20 inches square.

My piece is created from "leftovers" from a larger quilt made earlier this year, "From The Redwood Forest:  A Moment In Montgomery Grove".  I'll show you some of the cloth as it was being created.
I wasn't as good about documenting my process with this quilt as I should have, so apologies in advance.  Sometimes I feel like I need a 3rd limb to photograph work-in-progress!
The background cloth (silk broadcloth)
is being created using thickened dye spread with a palette knife

stenciling with thickened dye...

Here is the first quilt prior to finishing.
I trimmed a significant portion from each side.
It was with these "trimmings" that I created the Quilt Alliance piece.


This piece was constructed by trimming the remnants from the larger quilt,
then piecing them together using monofilament and a zigzag stitch

Once pieced, I imagined I could see portions of a tree.
Using paint, I accented the negative space behind the tree, and
singled out portions of the base to resemble roots.

I mounted the construction onto a piece of green silk-cotton Radiance wrapped 
around felt.

If you have a QR scanner, you can listen to me discuss the quilt.
This label is created by Stkr.it
I love these!!  Article coming in a future Quilting Arts magazine issue.

Now, I admit that it is more than a little terrifying to paint over a quilted construction, at least the first time you do it.  I'm reminded of a favored quote by the wonderful dancer & choreographer, Twyla Tharp:

"Venturing out of your comfort zone may be dangerous, yet we do it anyway because our ability to grow is directly proportional to the ability to entertain the uncomfortable."