Showing posts with label studio photos. Show all posts

Tuesday, July 9, 2019

2019: Where Has The Year Gone?

I have been exceedingly negligent in writing on my blog.  I've had my reasons, but still.

Here are a few images to partially explain why I've been absent in the blogosphere:


All these photos represent a small sampling of the very large renovation project that was underway in our home beginning in July of 2017 and finishing in February, 2019.  We had major roof repairs, new windows and walls to replace the rotting, leaking ones, cut a larger hole in the entry and installed a beautiful door, and in the process had a flood in my studio.
I moved everything back out of my studio and was not back in until just before the holidays as a new wood floor was needed.
Old one being removed....
and..UGH!...the sheetrock had to be cut out.

I had to move everything out of the studio to storage.


New wood floor (same type, but wider plank wood) was applied.
This time we put a cork underlayment to provide some nice cushioning and also a bit of noise attenuation.
One little bright spot in all this is that I added design wall to two more walls.  I realized shortly after doing the studio remodel that I "should" have put more on the existing walls.  I used the disaster to update those areas.  See?  Lemonade from lemons!


Here is the cork underlayment...

Moving back into the studio!  Yay!

Here is one of my new sections of design wall which is 
immediately to the left of my sewing table.  It is handy for pinning notes 
and even small sections of a construction while I work.
I love the addition of these two new design wall sections!  I
cannot imagine why i didn't put these in when we did the original 
remodel, but I am so happy I have them now!   See?  From something unfortunate comes
something good...


In November I finally had my right knee replaced.  This was LONG overdue.

The months since my surgery have been focused on recovery and rehabilitation.  I was in physical therapy twice per week from November through mid-May.  Interspersed I have been traveling.

In January, I taught at Craft Napa.  I was very careful to use the stationary bike at my hotel to keep my knee moving!  More on that in the next post.

Thanks for stopping by!  


Friday, August 21, 2015

Studio Story Part 3: Overcoming the Unexpected

Even when you anticipate that there will be things that you don't know about......let's just say that we have had more of this than we anticipated!  Ha!
I am trying to remain philosophical.  Tis better to know the reality and deal with it, right?!
Yes, that is what it looks like:  an enormous (!) old honeycomb was removed from behind the old shower plumbing.
See that line running UNDER the foundation?
That is irrigation pipe, and it was not capped off.  The studio is part of a major addition 
that was added to the house by the original owners.  Who did it?!

The corner just left of the left window in this image was in such bad repair the entire thing was reconstructed and waterproofed.  

These two people, my architect and the project foreman, are working together to get it done properly.
Many problems have been solved.

Here is the newly-widened doorway leading into the new wet-area.  
This will have a  pocket door.

A new shelving area was added to the old hallway...

And this was taken standing in a newly-created doorway looking from the hall into the wet-area.
The plywood on the far side of the room will eventually be the new door leading out to the side yard 
and a newly-poured concrete slab where I can do stinky messy stuff.

Looking from the main room down the hallway...

Some other fun stuff....
I'm looking at materials for the space.  I chose this birch flooring/stain (on the right)
for the main design area of the studio (the wet-area will have simple concrete floors with rubber mats).  The hexi tile will be installed on the floor of the old shower area in the wet room.  The gray composite material in front of the hexi sample is laboratory countertop material, which is what I intend to use on the counter of my wet studio (just one place, everything else will be stainless surface).  

Here we are looking at a variety of subway type tiles for the shower walls.  I want a combo of rectangular pieces (naturally!) so we are discussing how to do this.

Maybe some combo of these?


I was able to sneak out and carve our initials into my newly-poured slab.
I've always wanted to do this!  Yay!

The status is that we are still chasing an occult water leak which seems to be coming from failed caulking around the old window frames.  This has caused a lot of damage and we are dealing with that.  The sheetrock work really can't begin until this has been solved but the crew is finding many things that can be done while the search is on for the leaks.  The electrical upgrades have been put in place.  I added another circuit to handle the potential load from multiple heat sources.  The design wall board has arrived.  I am using the same material as Nancy Crow has in her Timberframe barn in Ohio, a product from Canada which is not frequently used here in the States but is AWESOME for pinning!  We have figured out how to put it up and finish around it.  


Monday, September 23, 2013

"Where Women Create: Quilters"


If you are coming to Quilt Market in Houston,
please join me, along with many of my fellow featured artists,
for a book signing at the Brewer booth on Saturday, October 26th, at 12:30.

I'm so honored to be a part of this beautiful book!

Thursday, December 13, 2012

The Studio=A Sanctuary of Joy


I enjoy reading Robert Genn's newsletter.  Sometimes the posts resonate with me
in a more profound way.  A recent post was one of them.  I love knowing about
other people's studios.  I am, quite frankly, much more interested in seeing a
studio space while in-use.  In other words, while beautiful, pristine studios are a
type of eye candy, I really want to understand how the artist uses his or her
space, neat or beyond messy.  I think that is why the following post appealed
 to me.  Read on...


Studio dynamics

On Sunday, I happened to stumble on some photos of Francis
Bacon's studio.  He was really messy:

a combination of never picking up, mental chaos, and compulsive

 hoarding. His canvases on their easels, where you could find them,
were paragons of calm.

Through the Jungian (or perhaps familial) collective unconscious,
 my daughter, Sara, who has just arrived here from New York for
the holidays, has been building her own photo collection of artists'
studios. We've put a link to her collection at the bottom of the
current clickback. Bacon's mess is in there and so is mine.

I've always figured that a studio, as well as being an efficient
workroom, can be a menagerie of life's objects, reference, media
and ideas-in-waiting. When checking out other artists' studios,
I've noticed that the filing of material can be either spatial or alphabetical/numerical. I'm of the spatial persuasion. I know
the "general area" where things can be found. I was not present
in school the day they covered alpha/numeric.

Somewhere over there on the bench, for example, I have a two-
pronged tool for tightening the distributor cap on the 1926
Locomobile I once owned. The Loco was sold 35 years ago.
I bump into the tool every so often and consider throwing it
out, but the thought of using it for something someday holds
me back. In a studio, you never know.

I've been in some studios that are as spit-and-polish as a Marine
barracks. Pristine, virginal spaces make me realize my personal
dysfunction and how I could have been a much better person.

Once, I entered a lady's particularly magnificent, high-ceilinged,
north-lit space, lovingly created by her third husband in the
blush of their new marriage. She assured me that work went 
on in there. Only one problem--I noted the calendar had not 
been flipped for three months.

Modest or stupendous, tidy or messy, the studio is a sanctuary
of joy and love--a place where a unique person can do unique
things. In an age of co-operation and consensus, of office cubicles
and water-cooler gossip, the studio is the throne room of latter-day
kings and queens. The only bad studio is the unused one.

Best regards,

Robert

PS: "This is the place of creative incubation. At first, you may
find nothing happens there. But, if you have a sacred place and
use it, take advantage of it, something will happen." (Joseph Campbell) 

Esoterica: The currently popular field of "Chaos Theory" has
applications in many disciplines. The theory states that "initial
conditions" can yield widely diverging, desirable and often
unpredictable outcomes. A good way to understand chaos theory
is what psychologists call "the butterfly effect." From an unlikely
chrysalis a magnificent butterfly emerges. The all-too-common
human instinct to tame chaos may also be key to creative flight.
The messy artist puts her need for order into her art. Beauty,
uniqueness, and personal joy are the result.

----------------------

In the spirit of this post I decided to show you a few shots of my
recently "excavated" & reorganized studio.  I'm still not finished
with the closet area but the studio is functioning much better.
I know where things are, and because most things are on lockable
wheels (with a few exceptions) it has become much more versatile.
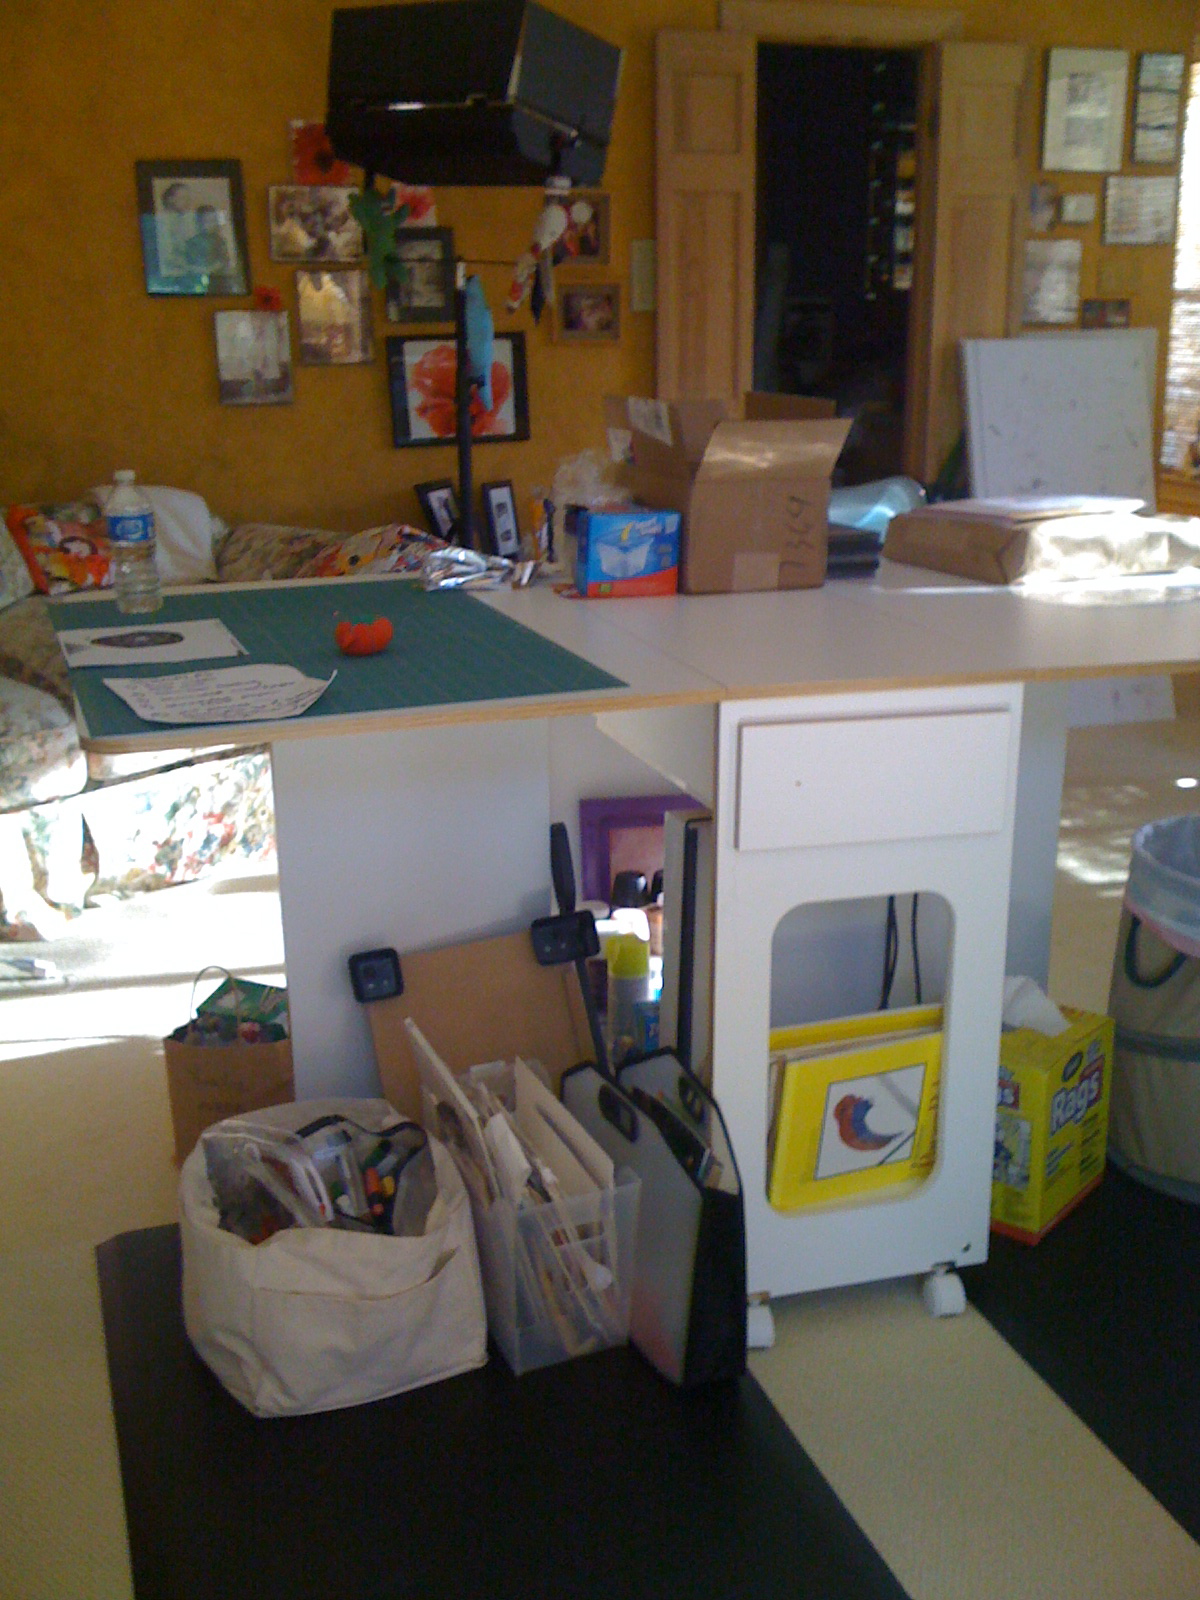
This is the north window in my studio.  From L-R:  a serious bank 
of lights, pointed upward, is what that weird black box-thingy is.  
Behind it, my Horn sewing table.  Between the table and to the left
 of the window is a shelf that houses all my hand-dyed silks & 
cottons, african batiks, MistyFuse, stabilizers, freezer paper, parchment, 
and iron-cleaning supplies.  Next to it is a set of shallow drawers that 
contain all my thread.
To the right of the window:  two industrial metal carts on lockable 
wheels.  The smaller one holds my laser printer, thermofax machine, 
ink-jet printer, and cordless land-line.  The bigger shelves hold fabric 
sorted into plastic binds that stand on end.  Behind the bins I have 
placed rolls of PFD cloth, bolts of felt, rolls of canvas, etc.
I have 4 sheets of felt-wrapped 4x8 RMax, 3 of which are suspended 
from large picture hooks and inverted paper binders (stabilized with 
some of that non-skid stuff inside the clasp so they don't slip off).

My new, adjustable height table.  Eventually I'll have the second one 
built, which is a straight sided table.  This will eventually be on the
 other side of the studio and will function mostly for mixed media 
painting work. So, this photo is about 90 degrees from the first one.

Turning another 45 degrees (you can see the edge of the design wall 
on the left) is my studio couch.  It is also a very comfortable, memory 
foam, queen sized bed.  This is the best sleeper bed on the planet!  
We have two of them in the house.  Solid under the mattress, you 
really are on a real bed.  Amazing, but enough about the damn bed.  
This is where I think, write, and look at books.
Which is why I decided to get these vertical bookshelves.  
Best. Idea. Ever.  I love that the books take up less real estate 
in my studio and are positioned close to where I actually read 
them!  Yay!
The orange and aluminum cube stack houses printer paper, battery 
chargers, cords, my extra glasses that I keep in here, a drop file with 
all my workshop and other professional paperwork.  I have some 
relatively current magazines in the lower cube.  
Can you see Bizzi on the sofa?  She is my constant companion in 
the studio.
I have some artwork from my kids, friends, and a little photographic 
shrine of my late sister (and another bank of lights in the corner).

Turning to the west windows and 90 degrees to the right of the sofa 
is an old gateleg table that will soon be drop-kicked out of here!  
Yikes I hate that table!  The new table will move here and a second 
one will be where it was.  I have another tall set of industrial shelves 
on casters, this one holds silkscreens, medium, paint, paper ephemera,
 a paper cutter, and an enormous collection of markers and pens.  
The television/dvr is also on a rolling cart and has all sorts of toys 
& weird oddities hanging off it.  I store postcards, business cards, 
and moo-created stickers on the bottom shelf.  You can barely see it
 in this pic but there is another set of white shelves between the tall 
cart and the tv and it serves as a sort of flat file for watercolors, stencils, 
 beads and bead thread in the bottom two drawers.
Sitting in front of my gate leg table you can see a box of studio lighting,
 which augments the existing full-spectrum light banks in here.  These 
are set up when I'm photographing quilts and other large pieces of work 
so I don't have any "dark holes" in the lighting.
They are relatively cheap, set up easily, and I drag them out when I need 
them.  They haven't been put back in the closet yet!

Thanks for visiting my studio.  I'll continue to post images of my 
progress in re-organizing.  I am so glad I took the time to sort
all my "stuff", cull it, and find storage that works for the way I use the studio.  
through 

Let me hear from you!

Saturday, October 27, 2012

Studio reorg: the agony & the....reclamation

For the last 2 weeks I have been very busy.  I have avoided, avoided, AVOIDED the inevitable task of doing a deep sorting, culling, and reorganizing my studio space.  For the last 3 years I have been rushing from deadline to deadline, repacking for the next class or adding yet another strata of mess while working on a new piece.  This is my confession!
After finishing the latest set of projects I forced myself to begin this project.  My rule was that I had to look at every single thing in the studio.  I decided to separate all the things that I no longer use, including tools, threads, and even (gasp) fabrics.  Ugh!  
 Actually, this part was simpler than I imagined because the past 3-4 years has been more studio work intensive than ever.  I have a much clearer idea of how I work and what I use.


Some "before" shots:  stuff piled everywhere, both on top of and below my work table(s).

Here is one of the new tables, under-construction.
The electric, adjustable-height table goes from traditional height to 60 inches!  Woo Hoo!


starting to clear....

my Horn table with sewing machine


I removed my old, much-larger studio sofa and replaced with this one from another part of the house.

I built these new, awesome vertical shelves for books, 
as well as another for copy paper and other supplies

The new supply shelves are industrial metal on heavy-duty casters

I used one foot sections of R-Max covered with silk and spaced between cork boards 
to create this set of bulletin boards for my long hallway into the studio!


Much more to come, but this is a taste of what I am doing right before I leave for Quilt Market/Festival!
Stay tuned!


Tuesday, May 24, 2011

Shocker

Look!  You can see the surface of one of my work tables!  This is a rare sighting, indeed!

A few pieces of recently dyed fabric awaiting the next layer.

Below is the front of a birthday card I recently sent my oldest daughter.
It might apply to studio tidiness:


Friday, April 1, 2011

A (fairly) clean studio

Jamie is shaming me into sharing these photos.
Here is my confession:  my studio is usually is some sort of controlled chaos.  I don't like it, but that is how it seems to be quite a bit of the time.  I can blame it on all sorts of things (need more storage!,  no time!, fill in the blank with other lame excuses here).  The reality is, the studio is crazy quite a bit of the time.

That is why you should have someone over who wants to take pictures of the studio (and you).  Diana Kellerman, who wonderfully edits the Fiber Artists of San Antonio newsletter, wanted to do just that late last week.  I decided it was an opportunity.

When you see the following photos you might ask, "What part did she clean?", but seriously, it does look better. I do have a shortage of storage.  I do need to rearrange.  I will do this.  Someday.
 My main work table in the center of the room.
Two moveable design boards that are currently full of this and that.
My color laser printer, thermofax machine, and ink jet printer are on the rolling cart in front of one of the design boards.
What's that thing hanging in the center of the photo?  Why, a flying pig, of course.
My beloved Horn sewing table.

Ironing board in front of storage shelves.  
Do you think I have enough irons?

work table (clean!!) in foreground.
The thinking couch with my beloved studio assistant, Bizzi, taking a break.
Behind the sofa is Laura Beehler's "Red Alert".

This is the mixed media area, which is currently overloaded with supplies.
See the painting on the wall?
My oldest daughter painted my hands working at my sewing machine.
This was done when she was a senior in high school.
Other paintings by my daughters line the baseboard under it.
Am I lucky, or what?!

I commissioned my late friend, Prudy Kimmery, to create the two stained glass inserts for the windows.
I have wonderful natural light in this end of the room.
I look out on my amazingly beautiful garden while I work.

Eegads!  Lots of "stuff" up on the wall, yes?

My husband took pity on me regarding my dismal lighting for night studio work.
He dragged home this bank of serious lights and we situated it to bounce light off the ceiling.
My well-loved mascots reside on the stand:  my daughter made the red-lipped guy in front, and 
my good friend, Nina Perez, made the two other characters.
Behind is my little photo shrine of my late sister on the wall.

Let me know how shocked you are by my studio.  Maybe it will inspire more cleaning..........