Showing posts with label Stencil Blog Hop. Show all posts

Friday, January 3, 2014

Eat Your Kale! A blog hop featuring Rubbermoon Stamps and Stencil Girl stencils

Happy New Year!  I jumped at the opportunity to use Rubbermoon's Eat Your Kale and Kale Leaf stamps on a project because we Jenisons are big kale-eaters.  As a holiday gift I decided, among other things, to make some fun customized tea towels with a kale theme.

For this StencilGirl blog hop, we’re showcasing stencils by Kae Pea (Kristen Powers) along with Rubbermoon Stamps. Not only does Kristen design stencils for StencilGirl, but she is also the owner of Rubbermoon!
Best of all, both Kristen Powers and Mary Beth Shaw are hopping along with us!!

I gave tea towels to family friends and to each of my daughters.  I have a  thermofax screen with bundled asparagus so I made a set for each recipient.

"Eat Your Kale", by Gretchen Ehrsam

"Kale", by Gretchen Ehrsam


Using acrylic paint I pounced the paint onto the stamp surface.


The towel was placed over a padded surface.

Despite the fairly course weave of the tea towel I was able to get a nice mark with both stamps!

Next, I used the stamps and my Tribal Leaves Stencil on both paper and a length of cotton batiste fabric.

Tribal Leaves Stencil by Kae Pea (Kristen Powers)

This first piece of paper is Yupo, a synthetic paper that feels a bit like vellum.
This is a sample from a recent mono printing demo.  I love to use these as a base layer for additional marks.


Since the surface of the Yupo paper is so smooth I took a foam pouncer and "pulled" my transparent paint across the stencil surface to create a distinct edge of paint.  I like how it looks!
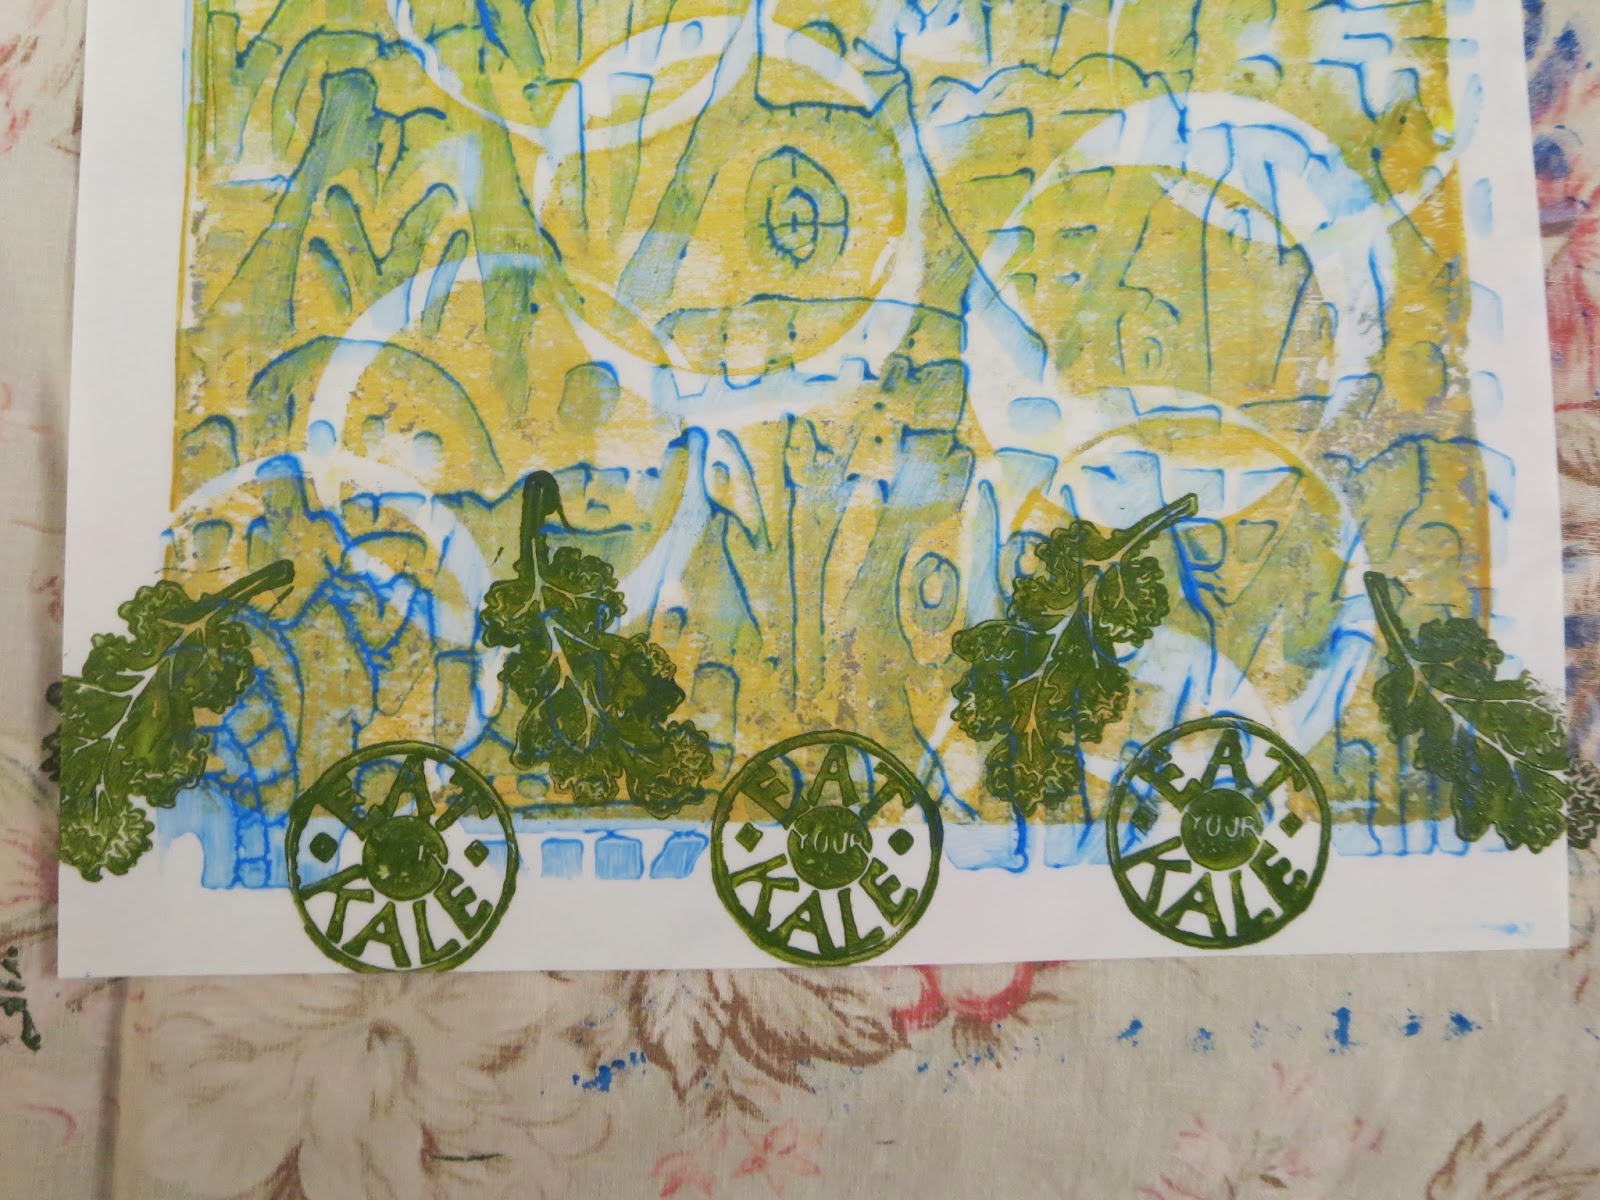
I stamped the Kale and Eat Your Kale stamps along the base.

I used both the stencil and my two Rubbermoon stamp on yet another sample that had been printed with Mary Beth Shaw's "Rafters" stencil:


I like the way the two Rubbermoon stamps interact with the first marks on the paper.


To add a bit of depth I used a Sakura gel pen to the printed edges

And, I add a portion of the Tribal Leaves stencil to the paper.

I love how this paper looks!
I think the combination of the Rubbermoon stamps and the Tribal Leaves stencil really work together.
What do you think?


The tribal stencil works extremely well on cloth.
Here, I am using a cotton batiste cloth that I had previously printed with thickened dye.
I was underwhelmed with this cloth and, to be honest, I had been using it as a studio rag.
Confession:  sometimes those studio rags and drop cloths end up being the best thing that happens in my studio.  I just roll with it.  LOL

Using some Setacolor transparent paint (medium blue) I pounced the paint through the stencil onto the surface of the cloth.  I deliberately varied the intensity of the paint coverage.

Result:   the cloth has a new life!  I love it!  I may finish the edges and use this as a scarf.
It has definitely seen a marked improvement, and the Setacolor paint has not altered the "feel" of the cloth.

I'm looking forward to working with all these new tools in other projects.  I see a lot of possibilities!
I hope 2014 is off to a good beginning for each of you.  Drop by and see me often!


We will have a giveaway on StencilGirl Talk blog consisting of SG product. All comments on the hop are eligible for the giveaway. The more blogs you comment on, the better chance to win. The gIveaway will close on Friday, January 10th at 11:59PM Central Time.


Here are the links to all the participating blogs.  Please be sure to head over to Maria McGuire's blog next.  Remember to leave a comment in order to be eligible for the drawing!  Thanks for stopping by!

Friday, September 27, 2013

Primary, Secondary, Tertiary Circles!

Welcome to another fun blog hop using Pam Carriker's "Primary, Secondary, Tertiary" stencil!

And, of course, the first thing I want to do is paint my color wheel with it.  Who could resist?  Well, I am resisting, at least for the moment.  Because the other thing this stencil reminds me of may be less obvious, but it strikes me as being similar to the shape of an instrument on an aircraft panel, or a compass of sorts.  That is how I intend to use it.
I have been thinking about doing a page related to a 25th anniversary road trip I took in 2012 with my friend, Karen.  We drove up the Pacific Coast Highway for the first time together in 1987 from Los Angeles to San Francisco, again a few years ago, and in 2012 we began in San Jose and headed north as far as Mendocino before heading south to Los Angeles.  It was while we were in Mendocino that we discovered the Montgomery Grove of redwoods.  This was my first encounter with the giant redwoods, but it has been a lifelong dream.  I wrote about this before, but for the record:  as a kid growing up in land-locked Kansas I wanted more than anything to see whales and redwood trees.  It took me longer than it should have to accomplish it, but it was an exquisite moment when I finally did.
Mendocino is such a beautiful place.
Here is an image of the coastline nearby.

Walking into the grove of the biggest giant redwoods was very humbling.

Can you see me?
(Lower left edge of the tree)


It was mind-boggling.

I created a quilt about it.
Confession:  I flipped the image because I made a technical error when I was making the "tree"
out of silk broadcloth.  Oops.  I'll just call it "artistic license".

I thought it would be fun to use the stencil to make a journal page.  I used two car rental maps I picked up on the trip.  I like to keep these for collage purposes.  Occasionally, I have to have an intervention with myself and cull some of these out.  Generally, I'm happy I bring them home because they are a nice "layer" in my work.
FIrst, I used Jessica Sporn's Flying Tulip stencil as background texture.

I tore a portion of the Mendocino map and layered it to the page with gel medium, 
Then used the Primary, Secondary, Tertiary stencil over a portion of it.

I did the same with a previously over-painted map on a watercolor postcard.

These were layered in place so that they perfectly overlap one another in terms of the stencil.

Taking another portion of my rental car map and positioning it so that the Mendocino National forest
is in the "bullseye" of the stencil, I glued the map in place and stenciled it with a transparent layer 
of green paint.

I moved the stencil over the page a bit more using opaque white paint and some 
more transparent green.

Then, I simply blotted a light layer of paint diagonally over the surface to 
mute things a bit.

This is the page prior to the postcard layer.


Positioning the card in place to match the background pattern of the stencil,
I glued the card in place.

(using Yes!) glue..

and a palette knife


Here is my sophisticated set of weights to secure the layers of paper nice and flat while drying.

Next, I used barrier letters and stencil letters to create "redwood" on the left side.

and "trip" with barrier letters set in place (this is prior to adding paint)

blotting the barrier letters with paint


I outlined the letters a bit in order to increase their visibility on the page

I added ransom numbers to the upper right corner.
Finished!

Don't miss out on all the fun!  Here are the other participating artists in the blog hop:


Friday, August 9, 2013

Get Your Daily Sprinkles Here!

Greetings!  Today I'm playing with something perfectly timed since tomorrow is my birthday!  I love cupcakes, perhaps a little too much.  Playing with this stencil , designed by June Pfaff Daley, will have far less calories than the one I might consume tomorrow.  Here goes!

June Pfaff Daley's Cupcake Sprinkles (S011)

First, using a Gelli Arts plate and a brayer I rolled some acrylic paint over the surface.
As you can see below, I mixed the colors together a bit.

I purchased a hunk of this floor adhesive stuff at Northern Tool & Equipment.  
I think it is for the garage floor.
To me, it looks like a great stamp!  Since there are circular elements in the finer part of the stencil I thought it would be a visually interesting background for the cupcake.

Using several pieces of watercolor paper and a variety of liquid acrylic paint and spray acrylic paint
I applied the paint, pressed the gelli plate surface with the improvised stamp, and pressed the paper onto it.  I did this repeatedly and varied the paint colors slightly, as well as using the tool as a stamp, but I did stay on one side of the color wheel to avoid making "mud".

Here are the papers....

Now, I plan to stencil opaque white paint through the cupcake opening.

I apologize that the images here are flipped sideways.  
I don't like it but I don't know what to do about it.

I wanted this white opaque paint because I am either going to apply another paint color over the surface, or simply use the white to allow the "toppings" to show.
Using the small circular openings I add decoration to the cupcake icing.

I added a few more elements that I will alter a bit later.

sprinkles...

I'm adding marker to the openings on the base.

Now, some Sakura "Souffle" pen marks


Using a cheap set of office supply stencils that I carry around when I travel 
(and I am traveling as I finish this project) I write on the surface

some more dots are added with the Sakura pens.

On this paper I elected to leave the cupcake white and work into the background instead.

Here are my finished pieces.  I like the partial words visible in the background.


Thanks for stopping by and I hope you will bounce on over to the other blogs on this hop!