I tried and tried to get potato dextrin (potato starch) to play nice, but I never could achieve the desired results. Enter the humble sack of flour.
Flour is cheap, accessible, and a wonderful surface design tool for the textile artist! The results can vary depending on the thickness of the flour to water mixture. For the following tutorial I mixed the flour paste to resemble thin-ish pancake batter.
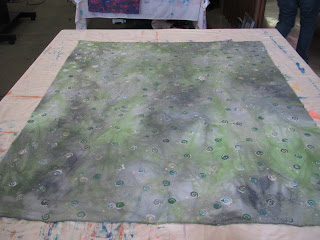
The cloth I will illustrate is part of a round robin exchange. The color was a bit muted for my personal taste, but a bigger concern to me was that the imagery on the cloth was of only one scale, and not really interconnected throughout the piece. While not completely unattractive, it just didn't excite my imagination.
This is how the fabric appeared when it arrived in my studio:
cotton broadcloth with procionMX dye, DeColourant discharge, textile paint
fabric was tightly pinned to the padded work surface
that was previously covered with a dropcloth.
A thin layer of the flour mixture was spread on a limited area of the cloth with a squeegee.
Using a rubber-end tool for manipulating oil paint, I wrote into the wet flour mixture.
Note: the tip of a brush handle works for this, too!
I might remove some larger lumps of flour mixture displaced during writing, but
I don't worry about it too much.
The flour paste mixture begins to dry fairly quickly.
That is why it is best to spread the flour paste on areas of the surface when writing into the paste.
For an overall crackle, spread it on the entire surface.
As soon as the resist begins to dry, it will buckle.
Oh! Will it buckle!
It will pull your pins out from the print table, so you might as well pull them out as soon as you are finished spreading the flour paste and making your marks.
Once the piece has partially dried, you might want to gently lift it off the table and hang it someplace.
You want the resist to be completely dry before proceeding.
here is a detail of the dry resist on cloth
To create the crackled texture with dye, mix procionMX into print paste.
Push the dye mixture into the dried resist. For this piece, I used a large round brush with plastic bristles and used a combination of brushing and "pouncing" motions to assure the dye penetrated through the open areas of the resist.
....in process
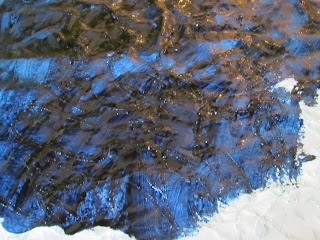
Here is the back of the cloth during the dye application process
Once again, pick up the cloth (if possible) and hang it in an open area to dry.
If this is not possible, simply leave on the print table and allow to batch completely.
This is what the back of the cloth looks like after the thickened dye was applied.
dye painted cloth after drying with the resist still on the surface
It is very stiff and crusty!
To dissolve the paste resist, immerse the cloth into a bucket of water with a small amount (1tsp) of synthropol or other surfactant, and soak.
Use care when disposing of the water mixture: you may want to dump this out in the bushes near your studio rather than pour down the drain, depending on how new your plumbing is. It is something to consider with many of the popular resists.
I soaked my cloth twice to remove as much of the flour paste and thickened dye as possible before washing in the machine. A bit of synthropol prevents dye migration into the open areas of the cloth.
look at the beautiful crackled surface!
The script is lovely
so we went from this.........
....to this
It just took a little flour and water, and a bit of time to dry between processes.
I hope you will try it, and let me know how your results turn out!


Good tutorial and very beautiful results! Thanks for sharing.
ReplyDeleteoooh, I've been wanting to try this! thanks for the tute!! xoxo
ReplyDeleteMe too, me too! Now, where's my Big Bag O' Flour?
ReplyDeleteOh, that is wonderful. I haven't done this for too long a time. I need to do some playing in the studio!
ReplyDeleteOooh, it turned out great! Very different from the last time I saw it. I'm also impressed with your ability to remember to take photos to document the process. I never remember to keep my camera with me!
ReplyDeleteLove this tutorial !! Putting on my I want to try list!!
ReplyDeleteWhat a transformation! It is gorgeous, Leslie. I just received Lisa Kerpoe's dvd and now if the weather will cooperate, I want to open up the dye studio. Have a great week.
ReplyDeleteGood job, Leslie, really good job. Thanks for showing it to us.
ReplyDeleteThank you for showing this wonderful tutorial!
ReplyDeleteYou are most welcome. Please write back and let me know how it goes when you try it. Lisa (aka Queen of resists) thank you-yes you remember this cloth "before". Sometimes I have enough sense to photograph my steps. I wish I could remember to do that more consistently. It is informative.
ReplyDeleteIf any of you play with flour paste resists and take photos I will post them here. Thanks!
Thanks for the tutorial. I love the results! I want to try it.
ReplyDeletefabulous effect Leslie! Just curious, have you ever tried that with paint?
ReplyDeleteI haven't, but I know that others do. I'm about to do some extensive experimentation with it on a variety of substrates with paint and dye. Stay tuned.
ReplyDelete