
First, let me show you the various prints:


For my short "Schoolhouse" presentation at the 2017 Fall Quilt Market I opted to create a project that uses the charm pack (a stack of 5" squares with all the prints) for a project other than a quilt. I love to create dimensional leaves and I hope you will enjoy trying this! Once you become familiar with the basic technique, you can vary the shapes any way you want.
For each leave you will need two 5" squares, plus one 5" piece of batting. This is a great project for using up all those extra scraps of batting left over from a quilt project!
First, place the two prints, right sides facing together, and the batting on top.


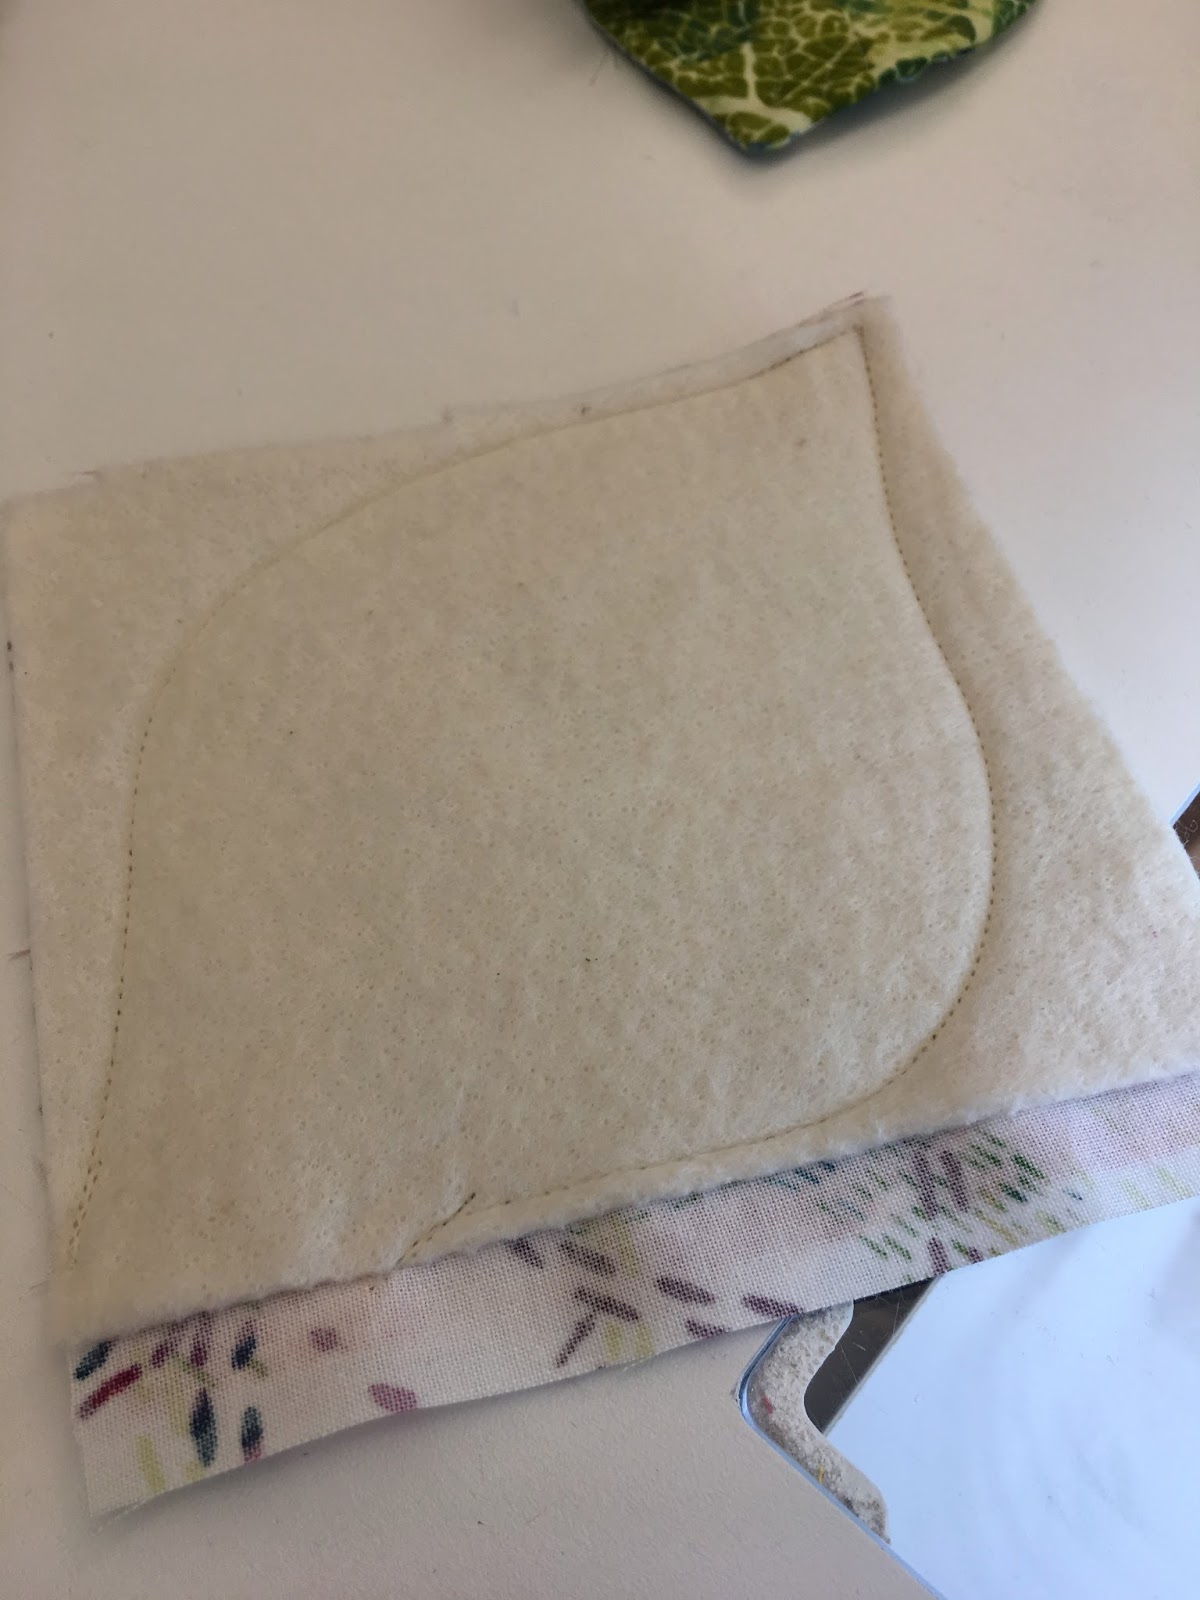
If you wish, you can use a chalk pencil or other marker to denote the stitch line. You can see I drew
a dotted line next to my stitch line so it is easier to see in the photo above. I opted to go with a simple leaf shape that utilizes the majority of the area in the square. I left a 2-inch opening at one end in order to turn the piece right-sides out. When stitching it is very important to back stitch the opening on both sides as well as the point of the leaf.

Trim the excess fabric and batting to 1/8 inch from seam. Also: cross cut the leaf point to minimize bulk.

To turn, slide a finger in between the two pieces of fabric. Gently begin turning the construction right sides out. I use the tips of my scissors to gently push the tip of the leave out as much as possible.

Here is my stack of fabric with batting (low loft is best).
It is easier to visualize the seam line from the "batting side".


Here, I am using the scissor edge to gently form the seam edges of the leaf.

To add the leaf veins, I use monopoly thread in my bobbin, but this is optional.
I opted to change the thread colors for the veining. You can use the same color top thread and bobbin, if desired. Pull the bobbin thread up to the top during this process. Lower the feed dogs if
you plan to free-motion stitch the leaf veins. Or,
as an alternative, you may straight stitch. If you have dual-feed it is helpful but not necessary.
If you aren't comfortable handing the leaf in this manner, the straight stitch will work just fine!
No worries!

Here is one option for the leaf veining.


After sewing the edges of the felt base I attached a loop onto the back.

Working from the lowest part of the base I stitched each leaf into place on the sewing machine.
At the top I created a "bow" using a tube of sewn print. I think any number of things
could be pinned to the top of the felt to make it "seasonal" (fall berries, a ribbon, a stuffed toy,
a hedgehog, a bunny.....you get the idea).

Have fun with this idea and please let me know when you make something using Urban Garden!
I love to hear from readers so drop me a line, but mostly, thanks for stopping by.
xo leslie