
We have a new set of twin boys, born late last year. Their father is an engineer, as are many of the men in our family. Somehow, robots seemed like a fun idea. I found some great fabric and decided to make 2 quilts with very similar features. First, I strip-pieced a large, square panel and cut it in two sections.
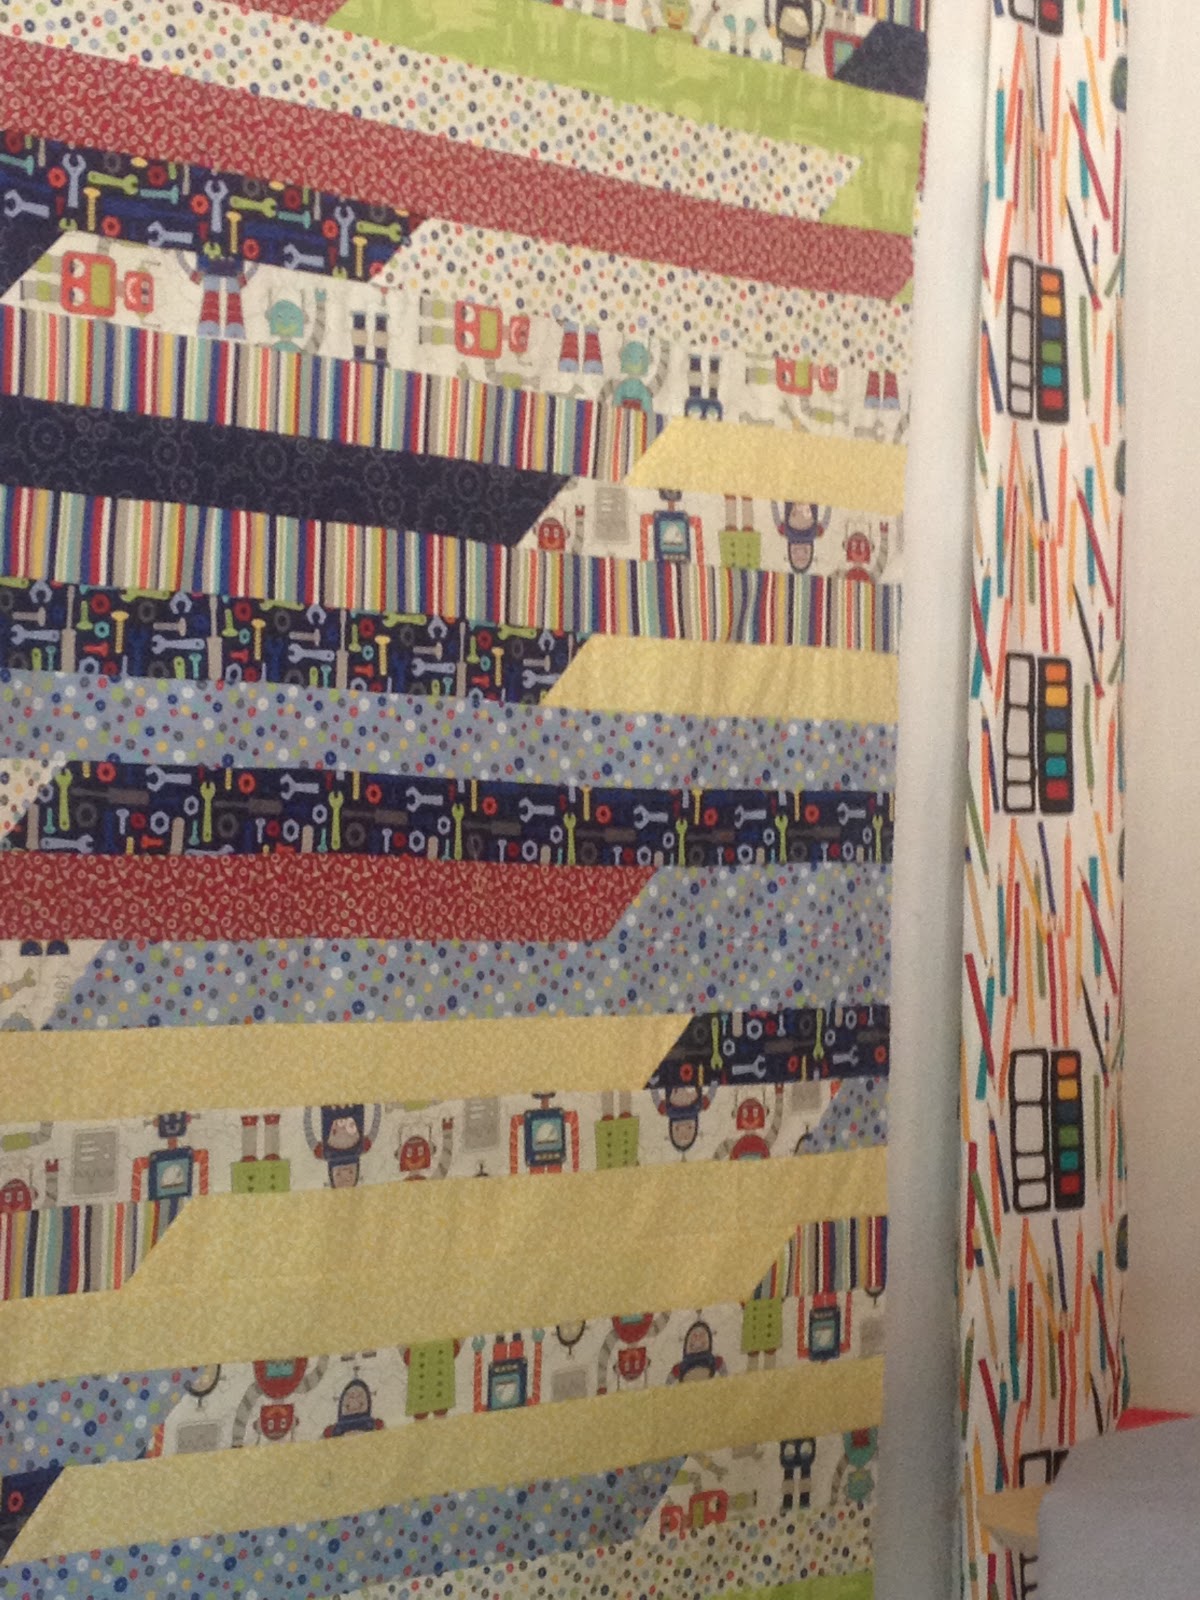
Here is a portion of one quilt as I am deciding how to do the borders.
I used my Go! fabric cutter to die-cut the strips, all fat-quarters. I took each set of strips and picked one from each pattern, stacking them one set after the other, and then pieced them. I did do the jellyroll trick of piecing them end-to-end, then sewed them, one long strip to the other, cut the end, brought it to the other and sewed.....until I got a panel that was the size I wanted.

Even though the border fabric with the pencils and sharpeners isn't
in the same fabric line, I like how it works

Here is the sketch of my robot's head

....and my sophisticated tracing tool!
(all the fabrics I am using to create my robots have been
previously fused with Mistyfuse. It is easier to fuse, then cut out,
my various shapes

The pieces are assembled over a teflon sheet

Using my awesome Havel's 7" scissors for cutting.
I love how well they hold the edge while cutting intricate shapes.

Robot head and neck

I referred to one of the robots in the fabric print for my design inspiration

Using a Pentel Gel Roller Fabric pen, I drew in a few details on the gauges...


Mr. Roboto #1 is finished and ready to fuse to the quilt top!

Here is Mr. Roboto #2


I decided to use the negative space from the hexi die-cut fabrics. My friend Jamie
suggested putting the colors behind the openings, which does make it more visible on the quilt surface.

I love the gray hexis, but they show up better after fusing them to bright solids and cutting around the edges.


Here is one of the two quilt backs...

and here is one of the two finished quilt tops.
Sorry for the odd angle on the photo.
Making these quilts was such fun! Using Mistyfuse and free-cutting the robot shapes was a blast!
Try it!
The bots are darling but I really love bow you did your background mixing the fabris up in the jelly roll fashion. Can you tell me if that was intentional or did they come in that order?
ReplyDeleteHi Stacy! Good question BTW. I edited my answer into the post under the first image
DeleteSo cute! Baby quilts are always fun to make.
ReplyDeleteYes, they are! These are larger than "normal" baby quilts, mostly because I never seem to be able to make a quilt the proper size. My enthusiasm spilled over, I guess. The finished size of these two quilts will be approximately 54x65.
DeleteI love them! (You could make the Mr. Roboto's into Mrs. Roboto's just by moving the gauges up a few inches, LOL!) Love your use of Mistyfuse AND the Havel's scissors ... I can't seem to do without either one anymore.
ReplyDeleteOh my! I like how your mind works, girlfriend. Maybe there is a Ms. Roboto quilt in the near-future! Ha!
DeleteI appreciate seeing the larger pictures on your blog, as opposed to in text messages. The quilts are really fun! Love, love, love - the robots. I am partial to robots, but you already know that about me. The twins will treasure these, for how bright and fun they are, but especially since you made them!
ReplyDeleteI DO know that about you (& robots). Thanks for your input about using the negative spaces of the die-cuts. Woo Hoo!
DeleteSo cute. And I'm pleased to see your process on top of what I am assuming is a pre-cut 2-1/2" strip quilt base. I have been threatening to do something similar with a batik strip base I sewed up a few months back. Thanks for the inspiration.
ReplyDeleteHi LynDee. These pieces were cut with my Go! strip-cutter but it could just as easily been done with a jellyroll or balipops set. If you fuse onto your batik quilt top, please stop back by and let me know how it went! Mistyfuse is great because it really doesn't change the "hand" of the fabric. For something I would be using I would always stitch around the fused pieces, which probably is not necessary for hanging artwork. Glad you were inspired. Please stop by often!
DeleteAwesome! Those are some lucky babies - how many kids get their own hand made robot quilts?
ReplyDeleteI had so much fun making them! I hope I have as much fun next week working on cloth!! Are you ready? I'm trying to get that way..
DeleteThey are fun, colorful and palyful. Love these quilts.
ReplyDeleteThank you, Margarita. I can't wait until I get to meet their owners!!
DeleteThanks for the great view of your process! And those are lucky kids. Hey, I want to talk sometime about mod quilt guild in SA. Thinking I might actually make a "real" quilt this year!
ReplyDeleteI've been having fun making "real" quilts, and I'm getting ready to switch gears and work on cloth next week. I love it all!!
ReplyDeleteThe robot looks terrific and it's just a perfect way to get the kids interested in robotics. My son liked robots as a little one and now it could be his future career.
ReplyDeleteHi Leslie,
ReplyDeleteI need to make a boy baby blanket. Do you mind if I use a version of this darling quilt??
Absolutely. Feel free!
Delete