Showing posts with label baby quilt. Show all posts

Friday, January 25, 2013

Building Robots

To get things started in 2013 I decided to do some pieced quilts.  Our family has welcomed several new babies, with another on the way this year.  I have missed piecing quilts, so as soon as the holidays passed I began thinking about what to make.  I have 4 different quilt tops going right now, which is insane, I realize, but sometimes the creative juices start flowing and I wanted to take advantage.

We have a new set of twin boys, born late last year.  Their father is an engineer, as are many of the men in our family.  Somehow, robots seemed like a fun idea.  I found some great fabric and decided to make 2 quilts with very similar features.  First, I strip-pieced a large, square panel and cut it in two sections.
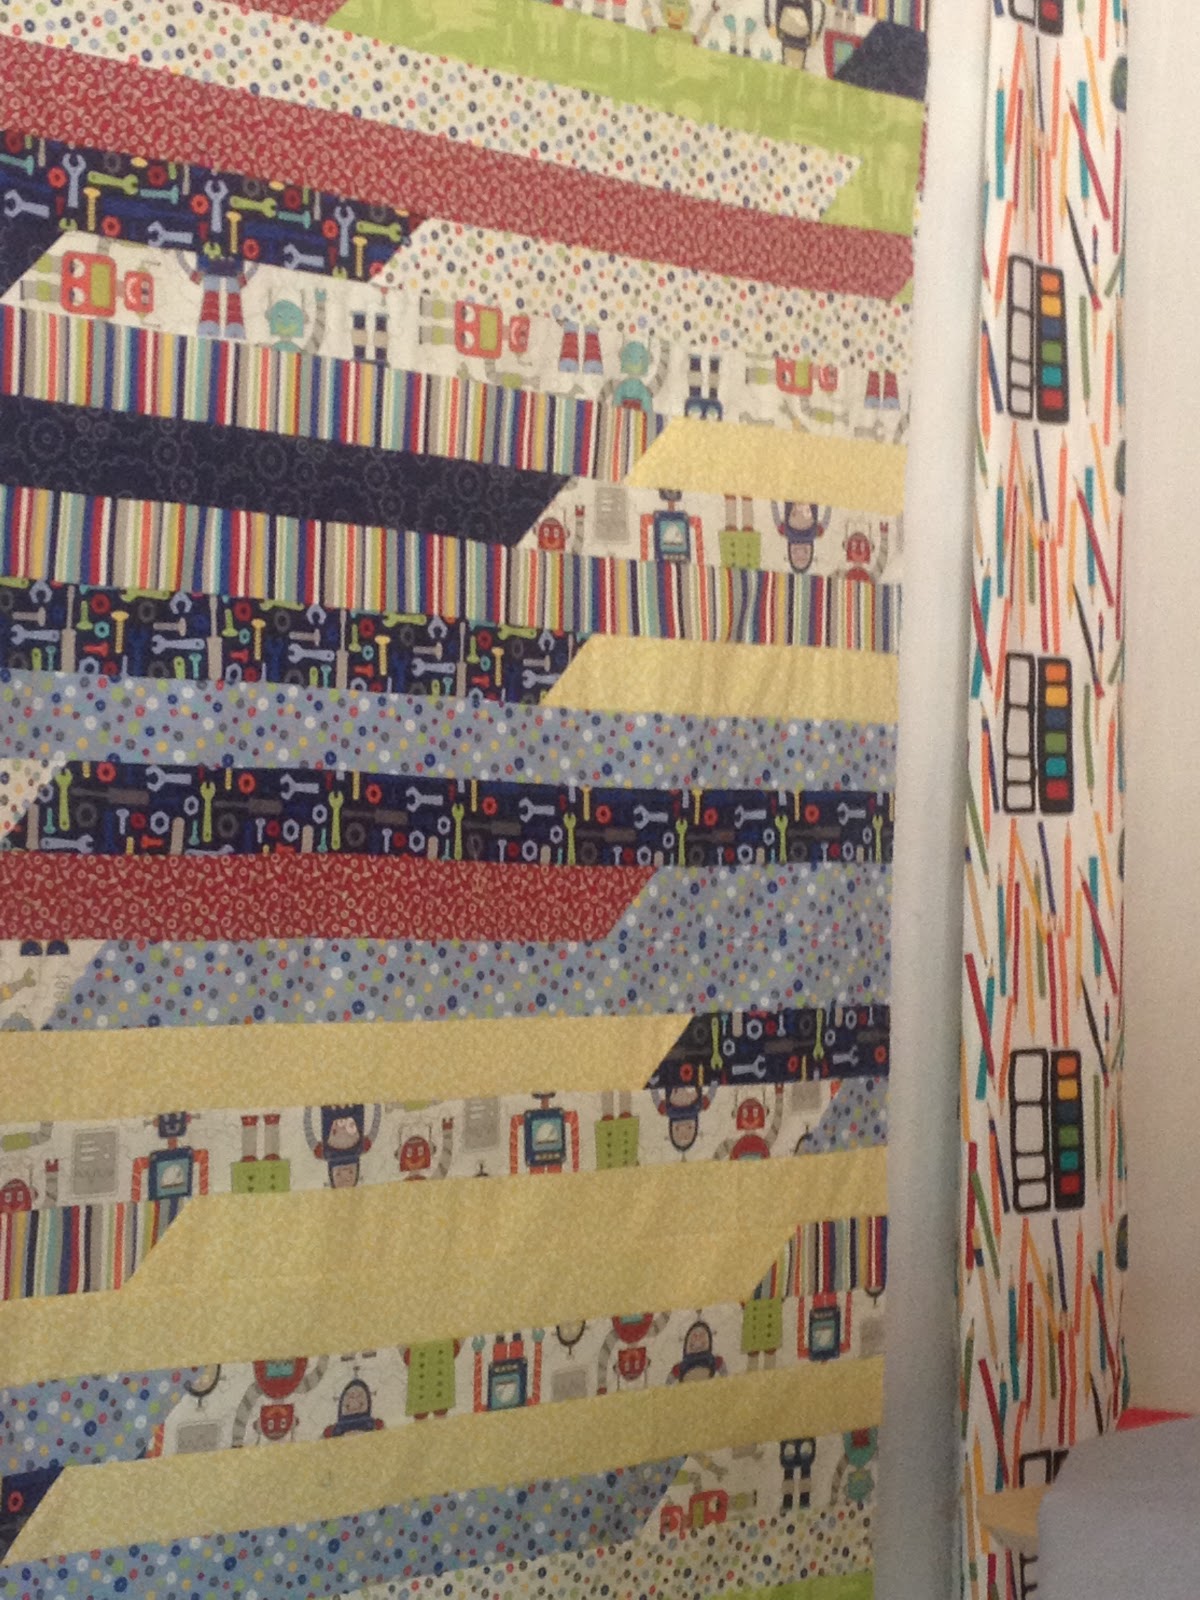
Here is a portion of one quilt as I am deciding how to do the borders.
I used my Go! fabric cutter to die-cut the strips, all fat-quarters.  I took each set of strips and picked one from each pattern, stacking them one set after the other, and then pieced them.  I did do the jellyroll trick of piecing them end-to-end, then sewed them, one long strip to the other, cut the end, brought it to the other and sewed.....until I got a panel that was the size I wanted.  

Even though the border fabric with the pencils and sharpeners isn't 
in the same fabric line, I like how it works


Here is the sketch of my robot's head
....and my sophisticated tracing tool!
(all the fabrics I am using to create my robots  have been 
previously fused with Mistyfuse.  It is easier to fuse, then cut out,
my various shapes


The pieces are assembled over a teflon sheet

Using my awesome Havel's 7" scissors for cutting.
I love how well they hold the edge while cutting intricate shapes.

Robot head and neck
I referred to one of the robots in the fabric print for my design inspiration

Using a Pentel Gel Roller Fabric pen, I drew in a few details on the gauges...


Mr. Roboto #1 is finished and ready to fuse to the quilt top!

Here is Mr. Roboto #2

I decided to use the negative space from the hexi die-cut fabrics.  My friend Jamie
suggested putting the colors behind the openings, which does make it more visible on the quilt surface.

I love the gray hexis, but they show up better after fusing them to bright solids and cutting around the edges.


Here is one of the two quilt backs...

and here is one of the two finished quilt tops.
Sorry for the odd angle on the photo.

Making these quilts was such fun!  Using Mistyfuse and free-cutting the robot shapes was a blast!
Try it!


Wednesday, August 15, 2012

Using Kaffe Fassett Shot Cotton in a Baby Quilt!

I'm sure I'm late to this party, but I recently fell hard for Kaffe Fassett's "shot cotton" collection.  I even splurged and bought the entire palette of colors, and as you can see by this image, it is a very big selection of colors!  I bought this quarter-yard assortment from Glorious Color.com.

My first project using these gorgeous colors involves a baby quilt.  I co-hosted a shower for a young (LA Modern Guild) friend recently, and decided to pre-fuse the fabric with Mistyfuse, then die-cut circles and flower petals in a selection of colors she is using in the nursery.  Each shower guest was asked to write a word describing a characteristic they hope the baby will have.  I used Pentel gel roller fabric pens for this and they worked beautifully.  For ease of use, I temporarily fused the die cuts onto squares of parchment.  

The fabric on the left is stretched over a canvas for nursery decor.  I am basing the baby quilt colors on it.

A close-up image of one of the shot cottons.  Gorgeous!

After fusing the cloth sections are doubled up and die-cut with my Go! cutter


I cut 4.5 inch squares from all these prints.
The flowers & circles will be fused onto the squares after the shower.

Rather than a traditional batting I have decided to use one layer of diaper gauze to keep this lighter in weight.  This is, after all, a California baby.  I also know that the baby has received two other beautiful quilts!  
 Here is the Pentel pen.
A sample....
die-cuts fused temporarily onto parchment squares....

After piecing the quilt top the die-cuts were fused to the surface


Two sections of diaper gauze yardage were zig-zagged together for the "batting".

This stuff is lovely!  (although I found out later that it causes a lot of tension issues when I attempted to free-motion quilt it!)


I pinned the quilt top to the gauze.
I decided to pillowcase the quilt and avoid the additional bulk that a binding would create.  Therefore, I pinned the gauze to the quilt top-only, stitched the quilt back (right sides together) around the perimeter and left an opening.  The quilt was turned right side out and the opening hand-stitched closed.  The edges were steam-pressed and re-pinned.  
I found that I had to use my regular presser foot (#1) and use feed dogs up to stitch this quilt together.